Articles

Use water-wise tips to create a low-maintenance, beautiful, xeric garden

It’s back. As of last week, we are officially back in drought status. Our unseasonably warm and dry winter (what happened to the wet and cold forecast of El Nino?), means it’s probably time to make some serious changes in your landscape.

Not watering your garden at all isn’t much of an option since everything will die and look awful. Your neighbors will hate you and your home value will tank.

Pouring concrete or removing everything except rocks to cover your whole landscape isn’t much of an option either. But there are many choices short of those two dramatic reactions that can and will work for you if you do your homework.

This is the crux of what we call Xeriscaping. Not “zero” scaping, as some mistakenly call it, but, using xeric plants and water-wise practices to create a landscape that will flourish in our extremely hot and dry conditions.

It doesn’t, however, mean never having to water or care for plants – it means developing a water-efficient landscape through the use of good planning, appropriate plant and lawn selection, efficient irrigation, use of mulch and proper maintenance. I often laughingly tell people, “it’s not carpet!”

So, what are the steps to developing a xeric landscape that will flourish in our extremely hot and dry conditions?

Seven principles of Xeriscaping

There are seven fundamental garden design principles that define that define what we call xeriscaping, water-wise gardening or drought tolerant landscaping. They serve to maximize water conservation through a simple set of steps that are easy to undertake. They include:

  • Proper planning
  • Soil improvement
  • Fitting plant selections
  • Practical lawn choices
  • Efficient Irrigation
  • Correct use of mulch
  • Proper maintenance

Plan your space

There are many options for reducing the need for water in your landscape. You can replace lawn with sitting and entertaining space – using paths of mulch, decomposed granite or flagstone, patios of native stone or bricks, wooden decks and gazebos, creating an inviting garden space when combined with planting beds. Dry creeks can be added to meander through your landscape – to address drainage issues or simply for aesthetic use as a textural contrast to plants and mulch. Water features – from ponds to disappearing fountains in ceramic pots can add a focal point and invite wildlife into your garden. Play scapes, hammocks, washer pits and fire pits or chimenarias can also be placed on a variety of hardscape materials in lieu of grass.

Enhance your soil

Whether you’re fighting black clay or limestone outcroppings and caliche, it’s sometimes challenging to garden in Central Texas. Creating raised beds will encourage give your roots something to hold onto in rocky soils and will create better drainage in clay soils.

According to Travis County Extension Agent-Horticulture, Daphne Richards, it’s good to occasionally add organic matter like compost to your soil, but says native plants don’t need a lot of fertilizer.

“Organic matter breaks down slowly, providing nutrients and helping to improve our soil structure as well,” said Richards.

Mulching beds is also important to help insulate plants, keeping soil temperatures lower and cutting down on evaporation. There are a variety of good mulches from which to choose, including: Native Texas Hardwood mulch (highly recommended), shredded cedar, pine needles, and other shredded barks. Several inches of mulch should be applied to ensure sufficient insulation. But never pile mulch up against the trunks of trees or shrubs like volcanoes as that can cause rot. Mulch should be placed around plants like a donut ring, with very little mulch touching the trunk and a raised ring around the plant to encourage water to remain inside the circle.

Water wisely

Many methods used to irrigate landscapes are inefficient. Most sprinklers – both automated systems and hose-end, waste a great deal of water to evaporation, particularly when run during the day. The most efficient hose-end sprinklers throw large drops of water close to the ground, rather than high into the air. Watering is also best done in the very early morning hours to prevent scorch and to minimize evaporation – even before sun-up for early birds or those with automatic systems.

Overwatering is also a problem. Watering for shorter periods of time too often encourages plants to keep shallow roots. Longer, less frequent, deep watering, develops deep roots away from surface heat that will require less water.

Drip irrigation is a good option to reduce water use. By keeping the water next to the plants and using little pressure, there is almost no evaporation and the soil is able to absorb and use all the water, whereas sprinklers often saturate soil and the water runs off the landscape. But drip has its drawbacks as well, requiring the lines to circle your plants’ root zones which can make planting and moving in an existing drip system cumbersome. Drip lines and emitters can crack or get clogged, but since they are under a thin layer of mulch, it’s often hard to know you have a problem before it’s too late and you have dying plants.

Collecting rainwater (when we are lucky enough to get it) is another way to conserve. From simple rain barrels placed under downspouts to large commercial systems, using this “free” water is always a good choice, especially since plants prefer natural rainwater to tap water that is chemically-treated.

Plant for success

Seasoned gardeners know that using a variety of native and well-adapted plants will consistently give you the best results under difficult conditions because those plants are used to surviving with what nature provides. They simply don’t need as much watering or maintenance.

Central Texas boasts a long list of native and adapted plants that, once established, can survive our rigorous conditions with less watering. When first planted, they will require regular watering for several months to get them started, but will then be less thirsty than other non-native or adapted plants.

Plants with similar water needs should also be planted together, so you aren’t over or under watering some of the plants in the same bed.

Turf grass is usually thirstier than the rest of your landscape. Reducing the amount of grass in your landscape can be the first step to significantly reducing your water needs. For Central Texas, Bermuda, Zoysia and Buffalo grass are the most drought-tolerant. Bermuda and Zoysia are commonly used in area lawns. St. Augustine requires a lot of water. It tends to grow better in light shade than most other grasses. Turf grass should be mowed high, allowing the longer blades to help protect the roots from the heat and to hold in moisture when there is some. Clippings left on the lawn help return nitrogen to the soil, so they don’t need to be collected.

Now, maintain it

Proper pruning, weeding and fertilizing will help keep your landscape healthy. Prune plants appropriately and remove weeds so they don’t compete with other plants for water.

Where to start

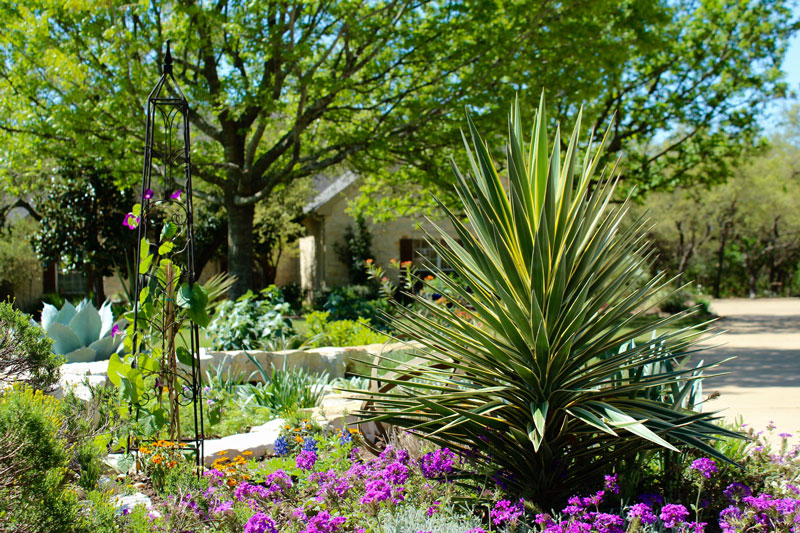
It may be hard for some to visualize a drought-tolerant garden that doesn’t scream desert. It can be so much more than using only cacti and agaves in a rock bed – unless that’s the look you want. There are many lush, green, and brightly blooming xeric native and well-adapted plants from which to choose when creating a water-wise garden.

In Pam Penick’s newly released book, The Water-saving Garden – How to grow a gorgeous garden with a lot less water, she provides homeowners with both practical tips and beautiful water-saving design options in the garden.
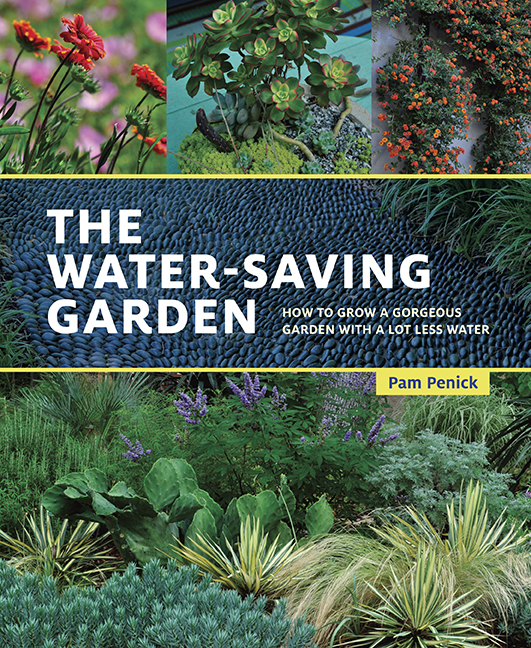
pam-penick-water-saving-garden-book-austin-garden-blog-

Penick, a blogger and author who gardens in Austin, has traveled extensively to learn about drought-tolerant techniques and styles across the country.

According to Penick, there is no single “right way” to plant a garden that saves water. Her focus is on planting thoughtfully, using drought-tolerant plants, grouping plants by water needs, and making the most of the natural rain you have in your garden.

Penick believes the most difficult aspect of promoting water-saving techniques is changing public opinion.

“The biggest challenge is changing people’s ideas of what a water-saving garden looks like,” said Penick. “People who’ve always gardened a certain way can be resistant to change, and they may have the idea that a water-saving garden is filled with cactus and rock, and they don’t like that look. I want to show that water-thrifty gardens can be just as beautiful as water-hogging ones, so that it doesn’t feel like a sacrifice, however virtuous, to make one.”

The book centers around Penick’s objective to “hold that liquid gold.” Viewing rainwater as something precious to be saved, stored or redirected, it includes detailed information about the use of rainwater barrels, cisterns, dry creeks, terraces and rain gardens.

The book also outlines the practical aspects of healthy soil, use of mulch and efficient irrigation.

Penick focuses on how to use the right plants and create ripple-zones in your garden to group plants by water needs. This will allow you to keep the thirstiest plant close to your house where you can water them more easily, and perhaps design the farthest ripple to be a more natural, non-irrigated area if your yard is large.

What makes this book stand out is Penick’s designer’s eye. It is filled to the brim with wonderful color photographs of water-saving gardens in every imaginable style. Gardeners will find plenty of inspiration to transform their own gardens.

Chapters focus on attractive shading options, permeable patios and paths, container gardens and water features. She even includes an inspirational chapter on water-evoking plants, highlighting ways to design the look and feel of water into your garden with “cascading or fountain-like form, or through color that, when massed, brings to mind a river or a pool.”

The book is capped off with a final section with 101 plant recommendations for water-saving gardens.

Penick says her inspiration for the book was practical, “I’ve always been interested in low-water gardens because I’m an inherently lazy gardener. I don’t like to have to stand out in the garden every day watering thirsty plants. Plus, we live where drought and watering restrictions are facts of life, and I want a garden that looks good with minimal babying with the hose. Other regions of the country are facing the same pressures, plus people are more interested than ever in living sustainably, so I wrote the book to share water-saving inspiration and techniques and to show that it’s possible to have a beautiful garden without having to pour water on it every day.”

Local Landscape Designer and Garden Coach, Diana Kirby, provides landscaping tips on Facebook at Diana’s Designs, at www.dianasdesignsaustin.com and writes a garden blog at www.dianasdesignsaustin.com.

By |2017-11-29T23:26:57-06:00February 27th, 2016|Articles|0 Comments

Build garden’s foundation with the right shrubs

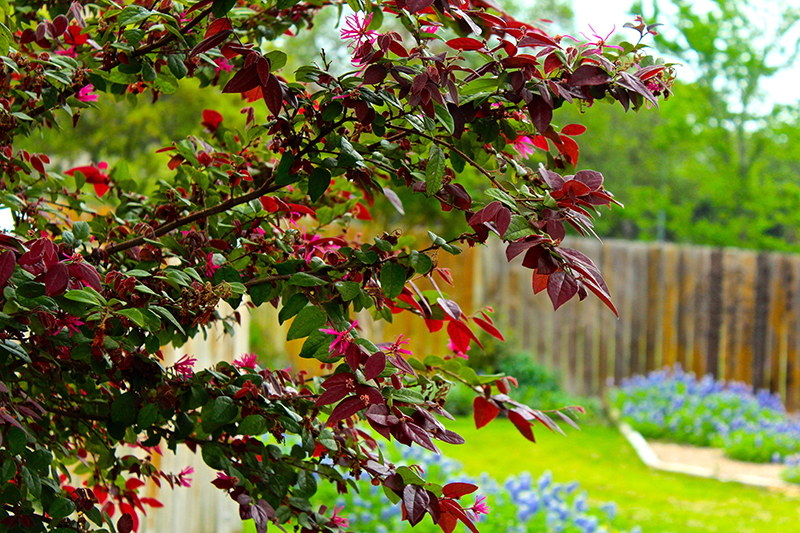
Diana's Designs Austin Texas Foundation Planting Chinese Fringe Flower

Most gardeners find themselves captivated by beautiful blooms. Nurseries put those showstoppers front and center, designed to lure in homeowners looking for the brightest, longest-lasting blooms for their landscapes. But venture further back and you’ll find the backbones of the garden – evergreen shrubs. These are the tried and true performers in the garden, season after season, year after year.

Called foundation plants, shrubs are often planted against a house to hide its foundation. They originally hid basements or open crawl spaces under homes. But they also provide a structural design foundation for layering with the other plants in the landscape.

When well placed, shrubs can soften the structure of the house and provide a transition to the surrounding landscape. A carefully crafted blend of evergreen shrubs, flowering perennials and colorful annuals makes a great formula for a beautiful garden bed. Regardless of your personal garden style, this combination provides cohesion in the landscape, allowing each unique set of plants to aid the transition of colorful interest in the garden throughout the season.

In spring, bulbs and tender annuals provide fresh bursts of color against the backdrop of established evergreen shrubs. In summer, hard-working perennials come into their own, blooming for the long haul and providing a contrast to the reliable shrubs. And in winter, when perennials are sleeping for the season, it’s the foundation shrubs that look beautiful and colorful against grey skies.

While many shrubs do bloom, they’re most often appreciated for their beautiful foliage contribution to the garden. With careful selection and design, foliage-only plants can be used to create a neutral and serene landscape, to be appreciated more for their nuances than the bright pops of color in a vivid perennial bed.

Plants, liDiana's Designs Foundation Planting in Central Austin Texaske people, develop issues as they age. Many shrubs tend to get leggy, with little or no foliage on the lower branches – caused, among other things, by poor pruning or a lack of sunlight from above. Overgrown shrubs are a common problem faced by homeowners. Homebuilders often plant large, fast-growing shrubs in very small spaces along walkways and under windows. When the plants outgrow the space in a few short years, these colossal shrubs can obscure the beauty of the house, leaving homeowners to fight their way into their own house with a machete. Sometimes it’s just time to put them out of their misery.

Having seen too many instances of this, I’m always on the lookout for smaller varieties of my favorite shrubs. This ensures that the mature size of the plant is the proper size for the space, and saves homeowners from having to constantly prune a plant that’s just growing the way it’s supposed to grow. Certainly, gardening is work and requires care and pruning, but planting a 6-foot wide shrub in a 2-foot-wide bed just isn’t going to work.

Evergreen shrubs for Central Texas Gardens

There are many hardy shrubs that grow well in Central Texas. Here are a few of my favorite small to medium-sized shrubs.

Evergreen shrubs aren’t always green. One of my favorites is the Loropetalum family of shrubs which range in color from an olive green to burgundy and even deep purple leaves. It’s also known commonly as Chinese fringe flower and comes in a wide variety of sizes from 2-4 feet tall and wide to as much as 6-10 feet tall and wide. There are many different color options from which to choose. The color of the leaves on some varieties can also vary depending on the light and soil conditions where they are planted. The shrub’s beautiful wispy, fringe-like pink blooms appear at various times throughout the year. I have several varieties, the small, ground cover-like ‘Purple Pixie,’ and a medium-sized variety, ‘Daruma.’ I also have a larger, mystery variety, which I have pruned up as a small tree. I’ve found them to be fairly drought tolerant once established and pest and disease free.

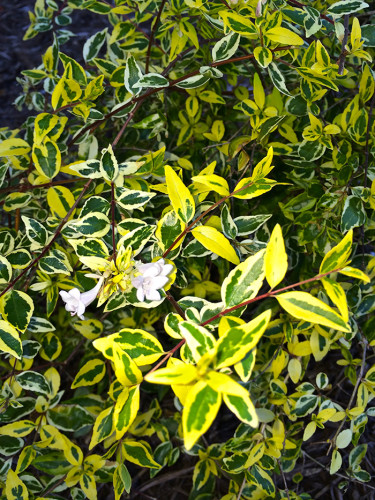
There are several variegated varieties of abelia that are my go-to shrubs. ‘Kaleidoscope,’ ‘Twist of Lime,’ and ‘Hinkley’s’ abelias are great for adding contrast and light into a bed. With varying degrees of lime and cream in the leaves, and some with rust-tinged edges in the fall, these three varieties are small- to medium-sized shrubs that grow about 4-5 feet tall and wide. They have white blooms several times through the year. There are many other abelias – with glossy, dark green leaves, with pink blooms, and much larger varieties of plants as well.

And no list of evergreen shrubs in Central Texas would be complete without Dwarf Yaupon Holly. This tough-as-nail plant doesn’t even miss a beat in our hot, dry summers. Compact and a nice medium size of 2-4 feet tall and wide, dwarf yaupon holly rarely needs pruning as it grows naturally into a very orderly-shaped orb.

Dwarf ‘Cream De Mint’ Pittosporum adds another interesting element to the landscape – a different form than many other common shrubs. This pale green and cream leaf is larger and somewhat rounded. Its growth habit is dense and compact and requires little upkeep. This can also be pruned into an interesting understory plant.

I’ve been growing the Leatherleaf Mahonia in my garden for quite some time now. It’s a spiky, upright shrub that’s right at home among cacti and agaves and yuccas and produces cool yellow bloom spikes in winter, followed by tiny, bluish black berries. Several years ago I had an opportunity to trial a different variety, the ‘Soft Caress’ Mahonia. They couldn’t be more different. The “Soft Caress’ looks like its name. Fine leaves drape delicately from this small shrub, providing a soft look in a shady garden. While it produces similar blooms and berries, it’s welcome and inviting, offering a beautiful contrast to woodier shrubs with waxy or stiff leaves.

I often mix in shrubs with variegated leaves, interesting forms, or colors other than green, to provide contrast in the garden. When landscape beds contain several layers of shrubs, all with medium-sized, glossy green leaves, none of the plants can stand out and shine it’s just a wall of green. When the combination contains one such shrub, but the other shrubs or plants are variegated or have dramatically different leaves, colors, leaf finish, forms or textures, it adds depth to the entire bed, enabling you to distinguish each unique plant from the others.

Once established, most of these shrubs are average to low water users. That means they will need a little more watering in the beginning to get them going, depending on the time of year in which you plant.

So, if you’re thinking of refreshing your landscape this spring, start with some unique foundation shrubs as the building blocks to enhancing your curb appeal.

Local Landscape Designer and Garden Coach, Diana Kirby, provides landscaping tips on Facebook at Diana’s Designs, at www.dianasdesignsaustin.com and writes a garden blog at www.dianasdesignsaustin.com.
By |2020-05-19T16:46:09-05:00January 23rd, 2016|Articles|0 Comments

Use gardening to strengthen and heal

gardening-as-healing-cancer-survivors-gardenGardens inspire us, they provide spaces for family and friends to gather, and they ARE the proven curb appeal icing that raises our property values.

Beneath the surface of beautiful blooms and stunning structure, lies a hidden gem that can also become a vital component of a healthy and balanced lifestyle.

Studies continue to demonstrate that working and spending time in a garden can improve our well-being – both physically and mentally.

Exercise

We all know that gardening is hard work. As we approach the New Year, there’s no need for an expensive new gym membership to go along with your list of resolutions. Making a commitment to a healthier you is as simple as walking outside your own back door. You can design your own workout routine, taking less time and avoiding the interminable Austin traffic. From basic movements to strenuous activities, gardening offers the right exercise, no matter what your needs.

According to the CDC (Centers for Disease Control), “Gardening is an excellent way to get physical activity. Active people are less likely than inactive people to be obese or have high blood pressure, type 2 diabetes, osteoporosis, heart disease, stroke, depression, colon cancer, and premature death.”

The CDC recommends being active for at least 2 1/2 hours per week, and including cardio and muscle strengthening activities. Gardeners are also more likely to exercise about 40 minutes longer on average than those who walk or bike. We know what that means – we set out to tackle one gardening chore, only to get sucked into pulling just a few more weeds or deadheading just a few more flowers. Be sure to start out slowly if you aren’t used to that kind of activity and always check with your doctor to make sure it’s safe for you to undertake.

Gardening chores can provide any level of activity from serious cardio – hauling bags of mulch and soil, digging and shoveling to simple reaching and stretching will pruning or raking. Raking leaves for just 30 minutes can burn 225 calories – and this exercise provides weight training and tones all the major muscles groups in your body.

Before you head out to garden, do some stretches to warm up, just as you would if you were starting a workout at the gym. Core strengthening like Pilates or yoga stretches will loosen up your muscles before you tackle garden chores.

It’s important to remember to bend and lift properly when you’re gardening. Bend your knees and keep your back straight when lifting and keep your feet shoulder width apart and hold objects close to your body. And be particularly mindful not to twist as you garden while pulling hoses or reaching for things. This can lead to back problems if you aren’t careful in your movements.

Emotional well being

In a recent study by scientists at Essex and Westminster universities, as little as 30 minutes of gardening a week can improve self-esteem, reduce anger and ease depression. In the research, reported in the UK’s Daily Mail and Daily Telegraph in October, scientists found that gardeners were less likely to be overweight, were more energetic and were less anxious.

Based on their findings, researchers said, “We found that less than 30 minutes of gardening produces a measurable and beneficial health effect.”

Other studies have also shown that electronic devices demand our constant attention, creating ‘attention fatigue.’ Spending time in nature, whether gardening or just enjoying the outdoors, can help us recharge by using what’s referred to as ‘involuntary attention.’ Being in the garden or completing mindless and soothing garden chores help us fight stress and reduce ‘attention fatigue.’

Scientists in Colorado have also released preliminary findings that suggest that microbes in the soil may actually boost the release of serotonin in parts of the brain that control mood, similar to some anti-depressant drugs.

Healing

According to the American Horticultural Therapy Association, spending time in nature reduces stress, lowers blood pressure and relieves muscle tension. Gardening can also help people who are recovering from physical illness by strengthening muscles and improving balance and coordination.

gardening-healing-cancer-Survivor-book-coverMy fellow friend and gardener, Jenny Peterson, a cancer survivor, recently wrote a book chronicling her journey back from illness, highlighting how her connection with gardening helped her through tough times. In The Cancer Survivor’s Garden Companion, she credits her garden with clearing the mental fog of “chemo brain’ and helping her overcome pain, depression and physical limitations.

Her premise is that gardening is good medicine. The book outlines garden solutions for strengthening bones and muscles, improving circulation and keeping your mind sharp. According to Peterson, healthy eating, herbal remedies, aromatherapy, yoga and surrounding herself with a tribe of loving supporters all contributed to her recovery.

She even includes tips on how to use gardening chores to fit your mood. For example, if you’re feeling angry, it may be time to dig holes or hoe in the garden. If you’re feeling the need for hope and inspiration, sowing seeds and planting transplants can help boost your mood.

“…plants are proven blues busters,” writes Peterson. “…they are timely reminders of how life continues despite what we are going through.”

“If you’re feeling thankful, think about harvesting things from your garden, like vegetables or cut flowers.”

The book includes Survivor Spotlights, which highlight information about and tips from other cancer survivors. It also lists many resources for cancer patients and gardeners. While the book’s focus is on her own cancer experience, its broad message about the hope and healing to be found in nature is universal.

Peterson writes about the importance of drawing strength from nature, and using her garden to remain grounded as she went through treatment.

“We feel off balance when we are sick or even when we are stuck working inside at a computer all day. Going outside and literally walking barefoot reminds us to slow down and get reconnected at an elementary level. It allows us to draw strength from the world around us when we need it most,” said Peterson.

Whether facing a debilitating disease or simply struggling to find health and balance in your life, there are many hopeful lessons to be learned in the garden.

Peterson’s book will be released on January 4, 2016. It is currently available for pre-order at Amazon.com and BarnesandNoble.com.

Local Landscape Designer and Garden Coach, Diana Kirby, provides landscaping tips on Facebook at Diana’s Designs, at www.dianasdesignsaustin.com and writes a garden blog at www.dianasdesignsaustin.com.
By |2019-07-15T19:14:41-05:00December 26th, 2015|Articles|Comments Off on Use gardening to strengthen and heal

Old adages still guide today’s gardeners

If you’re a gardener, chances are you’ve been the recipient of items handed down  or passed along to you. Whether from a grandparent, friend or neighbor, seeds, transplants and recipes readily make the rounds in garden circles.

Perhaps the thing most often shared among gardeners is wisdom.  Countless tips, techniques, proverbs and sayings are shared each day around the world as older gardeners teach younger ones and experienced gardeners teach novices.  The scope of such advice knows no bounds, running the gamut from adages regarding planting based on the moon cycles to signs that rain is imminent.

While many of the sometimes curious snippets of wisdom shared over the garden gate have proven to be myths or old wives’ tales, many of them hold true, even in today’s modern age.

I don’t remember where I picked up the adages that I use the most, they are just part of my vernacular and seem to have always been there.  The one I most often share with my landscape design clients is intended to urge patience, helping them manage their expectations in the garden.

Of newly-planted perennials, I will say, The first year they sleep, the second year they creep, and the third year they leap.”

When first put in the ground, plants need time to build strong root systems in their new environment.  Thus, growth above ground is generally slow, as they sleep, while the plant is putting energy into growing roots.

The second year of growth, plants begin to creep.  With more established roots, the plants will form new leaves, stems and blooms.  The plants will also be a little less susceptible to environmental issues than brand-new transplants.

By the third year, with a strong root system, plants literally seem to leap as they begin to mature and come into their own.

Obviously, this folksy adage can’t be applied literally to each and every plant in every garden, but it’s a good reminder that growing things takes time.  One of the most difficult lessons a gardener learns, patience often seems beyond reach. Holes and empty spaces in the garden simply beg to be filled.

In some of the more difficult spots in my own garden, I sometimes find that I have 3 different plants coming up in virtually the same space, because I haven’t been patient.  I used to keep a sign on my desk: Take my advice, I’m not using it. It’s true.

I’m probably doomed to try new things when existing plants aren’t moving along fast enough for my liking.  The lesson hasn’t taught me patience, but rather to buy bigger plants to start with.

Another of my favorite pearls of wisdom embraces the concept that much of gardening is beyond our control: “What you don’t fill, Mother Nature will.”

Gardeners often want to build a garden bed – excavate it, fill it with soil, and then sit back and pontificate about what might look great there.  Or they simply want to add plants a few at a time or in stages. Kind of like sitting on the couch in your brand-new house and pondering for a while before hanging art work on the walls.

Don’t get me wrong, thinking and planning are critical tools for creating beautiful, well-designed beds.  But once you’ve opened up the space and filled it with nutrients, every weed within a mile is going to want to grow there where it’s nice and lush.  But, a new bed that’s been filled up with plants creates a bit of an obstacle course that helps prevent air-borne seeds from landing on the soil. A bed filled with plants will also help shade out existing weeds trying to come up from below.  So, if you’re a thinker and you just can’t decide what to do with your bed, you’ll be able to entertain yourself by pulling weeds while you mull over your options.

The gardening acronym M.A.D. reflects my motto in the garden when plants don’t appear to thrive where I’ve placed them.  Then I have to make a decision – should I Move the plant, wait to see if it Adapts after a little while or let it Die if it requires more babysitting than I’m willing to do to keep it healthy.  Many Central Texas gardeners live by the adapt-or-die method where their garden conditions are particularly intolerable.

We’re used to drought and heat here, but with the unpredictable deluges and floods we’ve suffered through over the last few years, some plants are dying from too much water.  Our clay soils can literally drown plants that need good drainage. When I diagnose plants in decline from excess water, I tell clients that certain plants don’t like to have wet feet.  Some examples of those would include rosemary, grasses, yuccas and agaves.

Leaflets three, let them be.  Hairy vine, no friend of mine.  Around since the early 1900s in some similar form or fashion, these sayings have long warned people away from poison ivy or oak.  If you’ve ever suffered from a reaction to either of these, you can be sure you won’t forget these little rhymes handed down for generations.

Countless proverbs, adages and myths continue to be passed along in the gardening world.  While science may had disproven some of these expressions over the years, many continue to prove invaluable to today’s gardeners.

An ancient Chinese proverb best reflects my view of gardening:  He who plants a garden, plants happiness.

By |2019-01-08T17:04:58-06:00December 26th, 2015|Articles|0 Comments

Take care of tools to save time, money and work

caring-for-your-gardening-tools-implementsFor cold climate gardeners, now is the time to bring in tender plants, clean and put away the tools, and curl up with seed catalogs to wait for spring. Here in Central Texas, where we garden and use our tools most of the year, tool maintenance should be a regular practice.
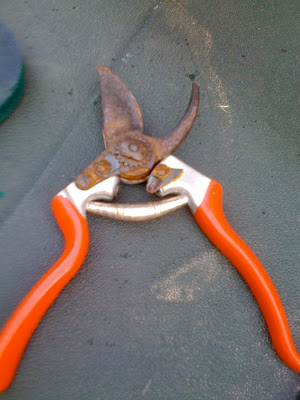
Even the most meticulous gardeners spin tool horror stories. Like the tale of the fish that got away, any gardener can entertain you with stories about pruners left in the rain or spades left in the compost. We’ve all done it. My best tool tale involved my tossing an uncapped construction paint can into a bucket where it immediately began spraying the Felco pruners in the bucket and the grass and everything else around it a bright, Day-Glo orange.

garden-tool-maintenance-removing-rust-from-shearsTaking care of your tools makes gardening easier. Rust-free pruners cut more easily and don’t crush and damage tender plant stems. Sharp shovels and hoes require less effort to push into the ground. A little linseed oil will go a long way to lessen the amount of elbow grease your need to accomplish your gardening chores. And if you’ve priced good bypass pruners lately, giving tools a longer life means more money for plants.
Designed to make clean up a simple habit, use these quick-care tips to lighten your gardening load

Rinse off your tools immediately after using them. Stuck-on wet soil, especially our terrible clay, sets the stage for rust to begin degrading tools. Use a scrub brush or S.O. S. pad to remove any stubborn remains. Wipe them dry with a rag and leave them outside for a while to fully dry.

Just as you carefully oil and ‘season’ your cast-iron skillet, oiling your tools will also give them longer life. Fill a small plastic container with sand and barely moisten it with linseed oil, or even motor oil. Then push your hand trowel down into the moistened sand, pull it out and let the gritty mix help you clean your tool as you rub it with a rag, removing all the sand.

For tools that have collected sticky plant sap or resin, use a little paint thinner on a rag to remove the residue before the sand cleaning process.

If your pruners are already sporting a nice burnished coating of rust, roll up your sleeves and start by taking them apart. The most important rule to remember – as you begin to disassemble – lay each part out in a line on the counter in the order in which you removed it. Use steel wool or sandpaper to begin removing the rust. Then wipe the tool off and finish with linseed oil.

Travis County Master Gardener Sheryl Williams recently hosted a tool cleaning and sharpening gathering for a small group of Austin garden bloggers. She showed us her techniques.

“I grew up in a hunting family,” said Williams. “My grandpa taught me early on how to sharpen a knife using a whetstone, and then later taught me how to sharpen a hoe and a shovel.”

“I know some novice gardeners who have simply thrown away their tools because they didn’t know they could be sharpened.”

To sharpen tools, clean them, then use a sharpening stone or a file to sharpen the beveled portion of the blade. For hand pruners, a 6” smooth file should work, while hedge trimmers and loppers will probably require an 8’-10’ mil file. For harder steel tools, you may finish with a diamond or ceramic hone as well.

Do not sharpen both sides of the blade; make sure each filing stroke goes down the entire length of the blade with the file parallel. Don’t file across the blade or on the back side of the blade. This can lead to nicks and damage to the blade.

Williams keeps her sandy bucket and rag by her tools and makes a quick cleaning part of her routine each time she gardens.

Williams summed up best motivator of all for developing proper tool maintenance habits, “If you’re using dull or dirty tools to garden, it’s going to take much more human effort to do it.”

Local Landscape Designer and Garden Coach, Diana Kirby, provides landscaping tips on Facebook at Diana’s Designs, at www.dianasdesignsaustin.com and writes a garden blog at www.dianasdesignsaustin.com.

By |2017-11-29T23:26:58-06:00November 28th, 2015|Articles|Comments Off on Take care of tools to save time, money and work

Propagate now to grow new spring plants

Propagate-Plants-for-Spring

Fall will eventually usher in cooler temperatures, and with them, a brand new gardening to-do list. Shrubs, trees, bulbs and wildflower seeds will eagerly await planting time. While weeding and planting may dominate today’s short-term list, it’s not too early to plan ahead for winter.

With the tiniest temperature break, many plants in my garden are looking perky again. But I know that the first frost or freeze will take some of them out – killing the annuals and pushing the root hardy perennials into dormancy.

Most of us in the Central Texas area garden in USDA Zone 8, meaning many plants that don’t tolerate cold weather will have to be replanted come spring.

Rather than buying new plants next March, I will be propagating some and overwintering them in the greenhouse or the house. An inexpensive way to create new plants from those you’re already enjoying, taking cuttings produces plants genetically identical to the parent plant.

Many kinds of plants – woody and herbaceous – can be grown from cuttings. Different plants require different types of cutting methods, so make sure to research your particular plant’s needs before taking a cutting. One of the methods commonly used by homeowners is stem cutting, which is what I’ll be doing in my garden.

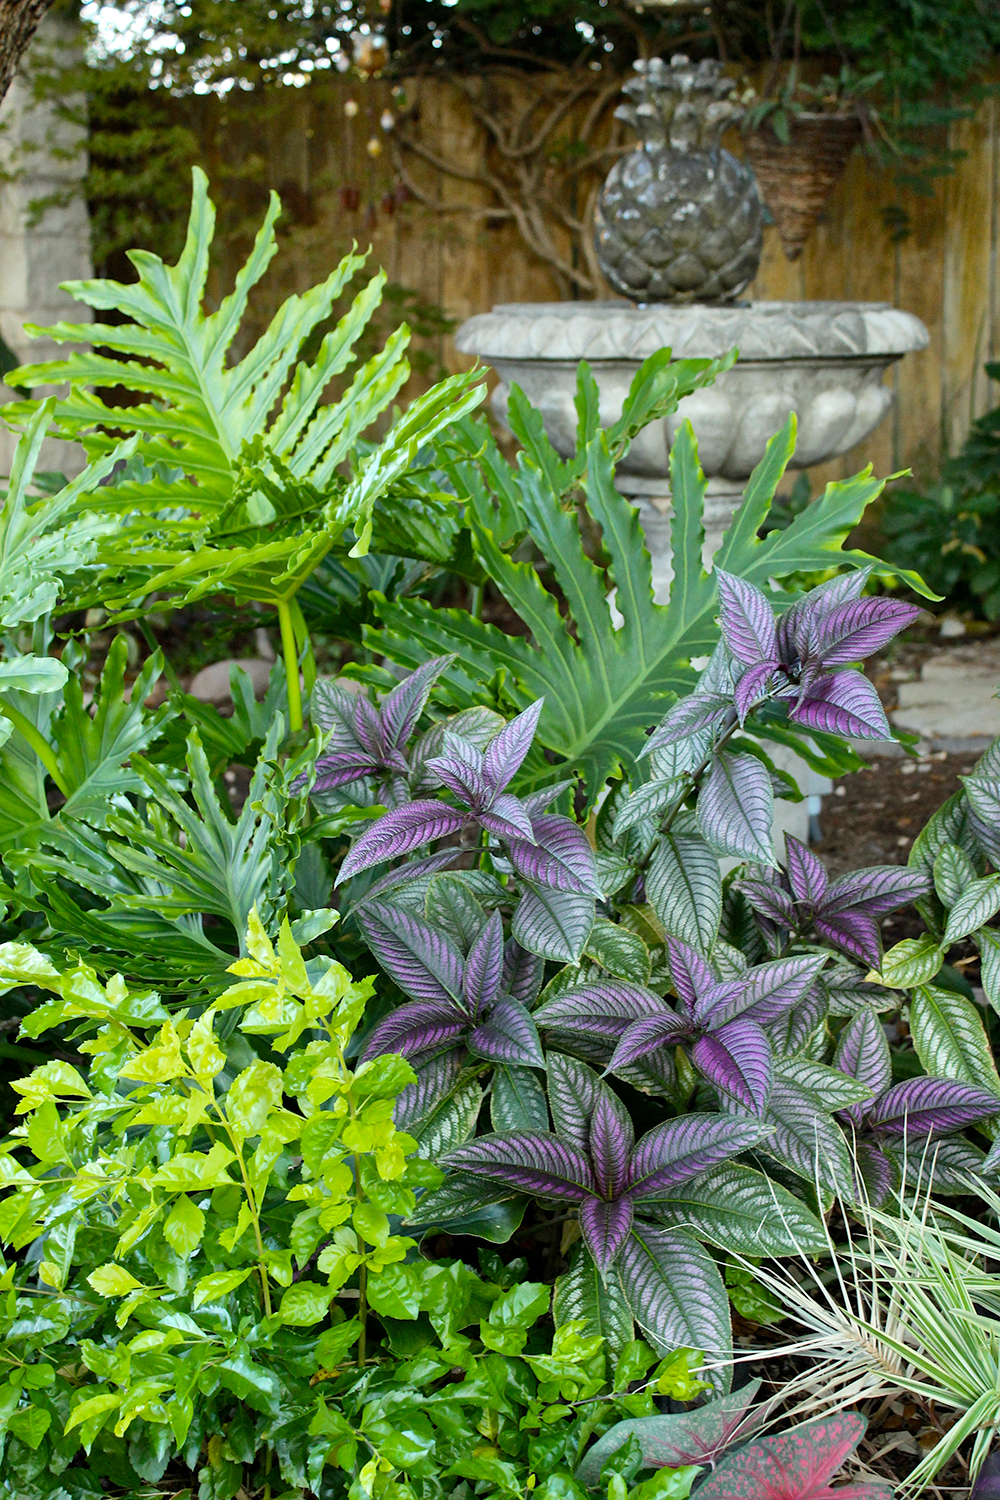
I plan to take cuttings of my Persian Shield, Strobilanthus dyerianus, so I have several new plants to use next spring. It’s often described as an herbaceous perennial, but it’s only hardy in USDA zones 10 and 11 (we are classified as zone 8). It can also be grown as a houseplant.

In my garden, it’s annual, dying with the first frost. Because it provides such a dramatic iridescent purple pop of color to my garden, I always buy new ones each spring. It’s a full shade plant and it does need an occasional extra squirt of water with the hose in the hottest parts of summer. I have it close to my pots and hand water it with them periodically.

Preparing to take cuttings

Before you start, clean your pruning tool by dipping it in rubbing alcohol or a mixture of one part bleach to nine parts water to prevent the spread of bacteria or fungi. Make sure you have a sharp blade to minimize any damage to the plant. To help promote root growth, you should also have some rooting hormone on hand. Rooting hormone can be purchased at most nurseries.

In your container, place a mixture of peat, vermiculite and perlite or sand and peat and water it. The potting mix should be sterile, like seed starting mix, so don’t use garden soil.

Make a straight cut 3-6 inches long, from the tip of a plant stem, at a 45-degree angle. You want to create the largest rooting area possible. Include the end of the stem and some leaves. Remove the lower leaves so the plant’s energy is used for root growth, rather than foliage growth. Remove the lower 1-1/2 inches of leaves on the stem, wet the stem, and dip the bottom inch or more into the rooting hormone powder, making sure some wounds from the leaf removal are buried. Then make a hole with a pencil in the growing mix and place the bottom of the stem into the soil and press down on the soil around the stem to hold it in place. Don’t press the cutting itself straight into the growing medium without making a hole, as this will rub the growth hormone off of the stem.

Taking care of cuttings

I’ll put my cuttings in my greenhouse in another month or so, but you can also make a small, pot-sized greenhouse for your cutting by placing an empty plastic jar, cut soda bottle or plastic bag over the plant. If you use a plastic bag, place straws or skewers around the plant to prevent the bag from touching the plant. The bag will keep the humidity high to reduce the amount of moisture loss. Keep the growing medium consistently moist.

Place the cutting pot in bright, but indirect light in a warm spot like a windowsill that doesn’t get direct sun. You can also use a heat mat, available at nurseries or garden centers and online, to encourage rooting.
Next spring, after the danger of a frost has passed, the cuttings will be healthy plants, ready to go out into the landscape.

Local Landscape Designer and Garden Coach, Diana Kirby, provides landscaping tips on Facebook at Diana’s Designs, at www.dianasdesignsaustin.com and writes a garden blog at www.dianasdesignsaustin.com .

By |2017-11-29T23:26:58-06:00October 24th, 2015|Articles|Comments Off on Propagate now to grow new spring plants
Go to Top