Articles

Plant This: Esperanza is a garden showstopper
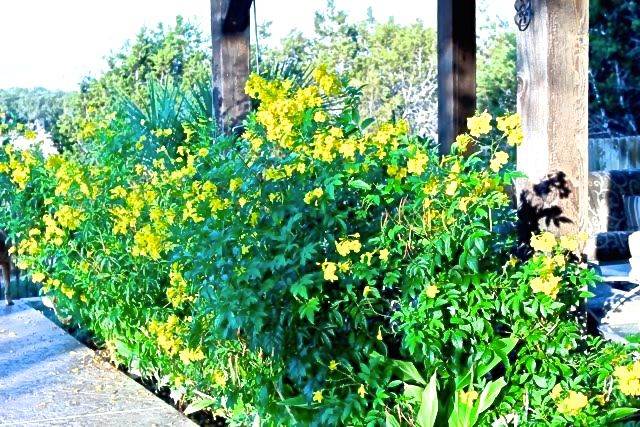
Showstoppers-Yellow-Bells-Esperanza

In spite of our schizophrenic weather extremes, many native and adapted plants perform beautifully in Central Texas gardens. One of my favorite showstoppers is Esperanza, Spanish for ‘hope,’ also known as yellow bells. It comes back reliably year after year — a dramatic garden showstopper that doesn’t mind the abuse our gardens suffer with periodic drought, heat and floods.

Native to Mexico, the tropics and West Texas, the variety Tecoma stans ‘Gold Star‘ thrives in our 100+ degrees and produces masses of large 2 – 3 inch blooms that look like yellow bells. This medium-sized shrub is xeric, low maintenance, and relatively pest free. This is the variety you see most around Central Texas.

They are generally cold hardy to zone 8b or 9; for most of Central Texas, they are perennial and reliably return from the roots. They thrive in hot sun and can tolerate a variety of soils, particularly our alkaline limestone. They typically begin blooming in the spring and bloom non-stop until late fall. Depending on how much sun they get, here they can grow as high as 6-8 feet tall and 4 feet wide. Although they go dormant in the winter, they shoot up quickly when the weather warms and consistently reach that height for me, in spite of being cut back completely at winter’s end. And, they are of no interest to the deer that like to browse my landscape beds.

Very popular with pollinators, bees and hummingbird are drawn to their nectar. I love watching them disappear into the deep throats of the bright yellow blooms to get a drink.

In the last few years, growers have developed a number of new Tecoma hybrids that give gardeners more choices in color and growth habit.
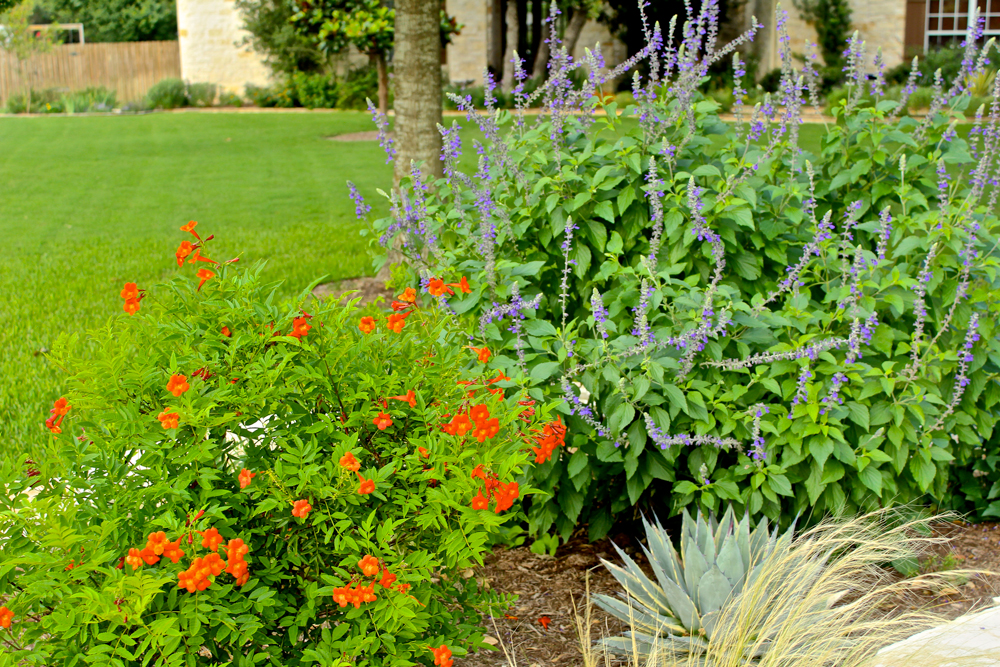
Showstoppers-Esperanza-Bells-of-Fire

Last year, I tried one of the newer varieties of Esperanza, ‘Bells of Fire.’ With high expectations, I found the perfect spot for this reddish-orange blooming sun lover. Like its yellow cousin, the new ‘Bells of Fire’ didn’t let me down. It didn’t bloom as early in the year as the yellow bells, but came into its own in early summer. Unlike ‘Gold Star,’ its blooms are slightly smaller; it is shorter, and more compact, reaching only 3-5 feet tall and wide so it can serve a different role in the landscape.

Also available at nurseries around Austin is the variety, ‘Orange Jubilee’ which is a lighter shade of orange, more like a creamcicle.

According to Michael Cain, owner of Vivero Growers Nursery, this orange variety is more like the ‘Gold Star’ in its growth habit.

“‘Orange Jubilee’ is more upright and sends up shoots up to 7 feet tall, “ said Cain. “It blooms a little later than the ‘Gold Star’ and does very well here – it’s really tough.”

Another variety new to the market is ‘Lydia,’ which has a more compact form and brighter yellow flowers. It grows to 5-6 feet tall and wide and blooms from early spring through fall. It’s a sterile variety, so it has fewer seedpods than the ‘New Gold.’

If you were thinking of including more heat and drought-tolerant plants to your garden this fall, any one of these Tecoma bells would be a great addition.

Local Landscape Designer and Garden Coach, Diana Kirby, provides landscaping tips on Facebook at Diana’s Designs, at www.dianasdesignsaustin.com and writes a garden blog at www.dianasdesignsaustin.com.

By |2017-11-29T23:27:00-06:00September 16th, 2015|Articles|Comments Off on Plant This: Esperanza is a garden showstopper

Freshen containers to rejuvenate your hot garden

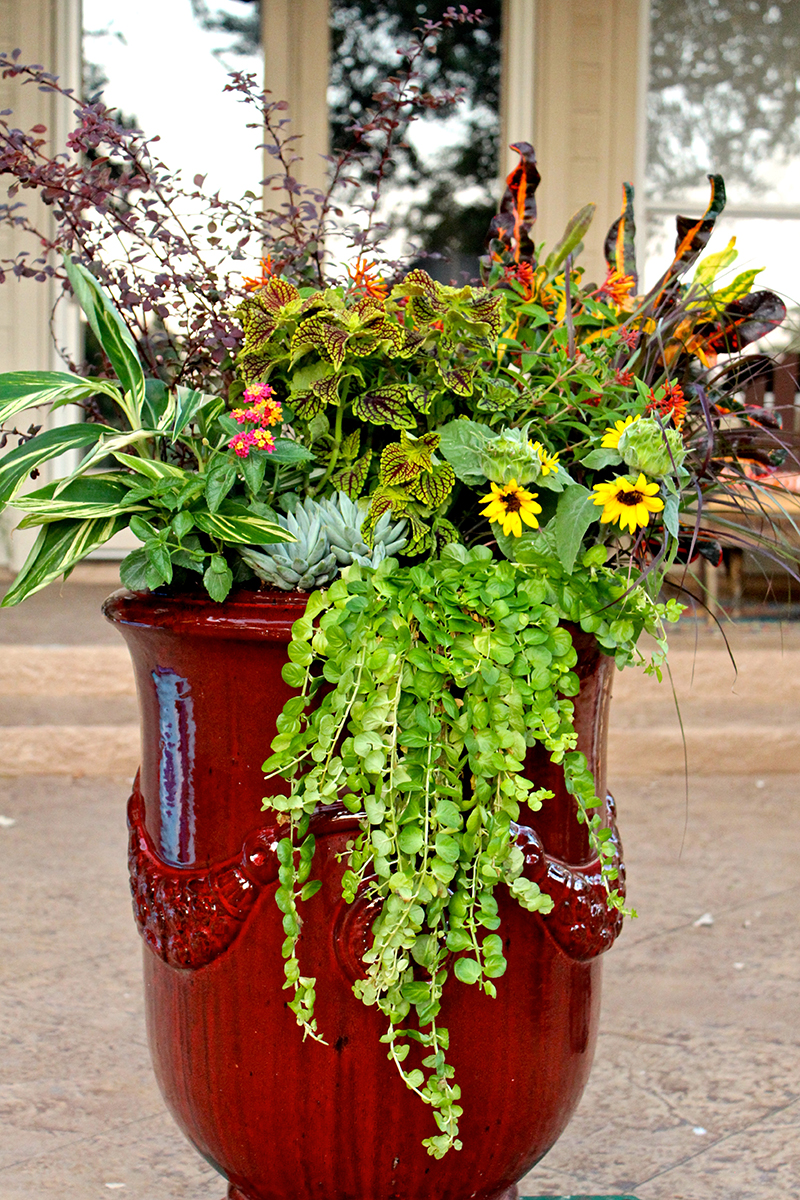
tall-container-fall-flowers

About this time of year, even the toughest Central Texas gardens and gardeners start to melt a little. With May rains but a distant memory, the unrelenting heat is taking its toll.

A quick and simple way to re-energize yourself and your garden for the slow journey into fall, consider refreshing your container plantings. If you have a nice pot with crispy inhabitants, now is the perfect time to start over. A fresh set of plants can provide a beautiful backdrop until the first frost.

Since the cooler temperatures of true fall won’t show themselves for a while, containers planted now still need to include plants that tolerate warm temperatures. Focusing on plants with new seasonal colors enables us to imagine that our respite awaits around the corner.

Designing a great container takes a little knowledge, some basic planning and a dash of creativity.

And pots aren’t just for patios anymore. Out in the landscape, containers create focal points, bring height or add shallow interest to existing landscape beds. In addition to creating conversation pieces with your plants, you can make use of things lying around in your attic or garage to create whimsical containers. A coat of paint in the right pop of color on a stock tank, or a simple plastic liner with a few holes placed into an old wooden box can transform your stuff into a welcome addition in your house or your garden.

Successful planting

As you pick your palette of plants, consider enhancing your creation with a varied selection of shapes, colors and textures. These contrasts will help your plants stand out. Your design can be symmetrical – balanced evenly all the way around, or asymmetrical, with unique plants extending to different distances on the sides or down the container. To achieve repetition and make your planter cohesive, you don’t have to duplicate the same plants around the container – just use plants with a similar color or texture.

Make sure you choose plants with the same sun and water needs so you aren’t over or under-watering any of your plants. Plants that appreciate the relief of a shady spot don’t fare well when combined with sun lovers. Most succulents and grasses make good partners since neither of them requires a lot of water and they both appreciate the sun. Adding a little mulch to your containers helps keep the soil cooler and lessens evaporation.

To keep your container plants thriving, it’s important to start with a good container soil that will allow drainage. Don’t use a pot without a hole in the bottom – this is the most common mistake in container gardening and can spell doom for your plants.

One tip for use in over-sized containers is to fill up the bottom with some alternate material if the plants you install in the planter don’t need all the root space of the container. You can fill the pot’s bottom with a variety of materials so not as much potting soil is needed. Make sure to use materials that won’t break down or decompose.

While there isn’t a formula to determine how many plants you should place in a container, it’s important to remember that your plants will grow. Consider carefully how they will mature – will they get taller, wider or trail and will they have enough room a month or two from now? You can plant things that may outgrow your pot after the season is over; then you can move them into your landscape and add new plants to the pot for the next season.

For containers that will hold more than one pretty plant, remember to include thrillers, spillers, and fillers. What are thrillers, spillers and fillers? That’s the recipe for making beautiful pots of plants – place a tall focal point (thriller) in the middle or the back of the container to rise up above the other plants and make an impact. Then place smaller plants (fillers) with contrasting or coordinating colors around the tall plant. Then finish the project with trailing plants around the inside perimeter of the pot to cascade down over the sides (spillers).

A good organic fertilizer ensures that your plants remain healthy, even as some of the nutrients leach from the soil through watering. Products like seaweed, fish emulsion or Hasta Grow are good organic choices.

Local nurseries, books, garden magazines and online resources like Pinterest and Houzz are brimming with beautiful container ideas and DIY information you can use to transform your garden containers.

Local Landscape Designer and Garden Coach Diana Kirby provides landscaping tips on Facebook at Diana’s Designs, at www.dianasdesignsaustin.com and she writes a garden blog at www.dianasdesignsaustin.com .

By |2017-11-29T23:27:01-06:00August 22nd, 2015|Articles|Comments Off on Freshen containers to rejuvenate your hot garden

Prune now for second set of garden blooms

Prune-Now-Blooms

With this spring’s unprecedented (some might say relentless) rainfall, most garden perennials have flourished. Ample water followed by summer sun has ensured plentiful blooms in our gardens. But as the heat rises, many root-hardy, woody perennials are reaching the end of their bloom cycles.

Unlike cooler climates, we are fortunate to have two bloom periods between the beginning of spring and the end of fall. Because our fall weather is so temperate, we have plenty of time for another bloom cycle before the first frost.

When the scorching heat begins to abate in September, we begin to see cooler temperatures at night. This respite fosters renewed plant growth. Plants produce flowers as the precursor to seed production that begins the life cycle all over again. When we prune plants after they’ve finished their summer bloom cycle, we stimulate new growth and production of blooms.

The beginning of August is the perfect time to take your pruners in hand and give your perennials a good haircut. Unlike deadheading spent flower heads, which can be done all season long, perennials should be sheared — cut back all over – by one third to one half. Don’t worry if you cut off some existing blooms, a new flush of blooms can appear in as little as a few weeks.

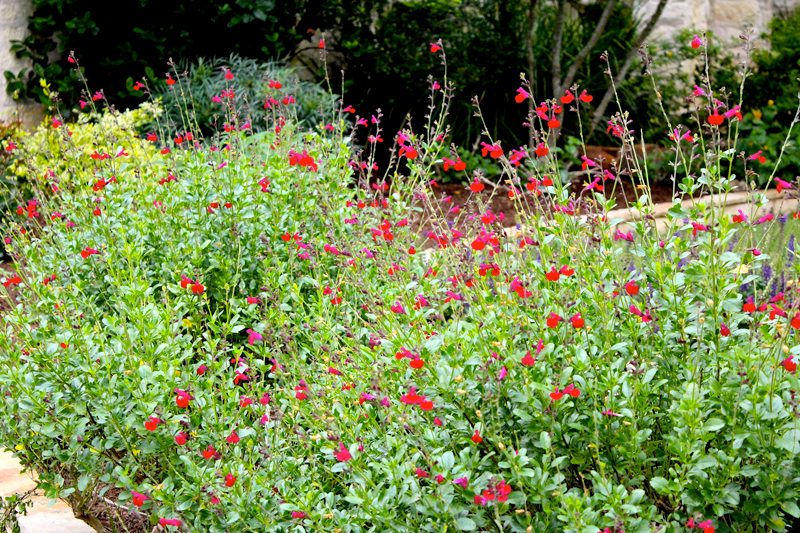
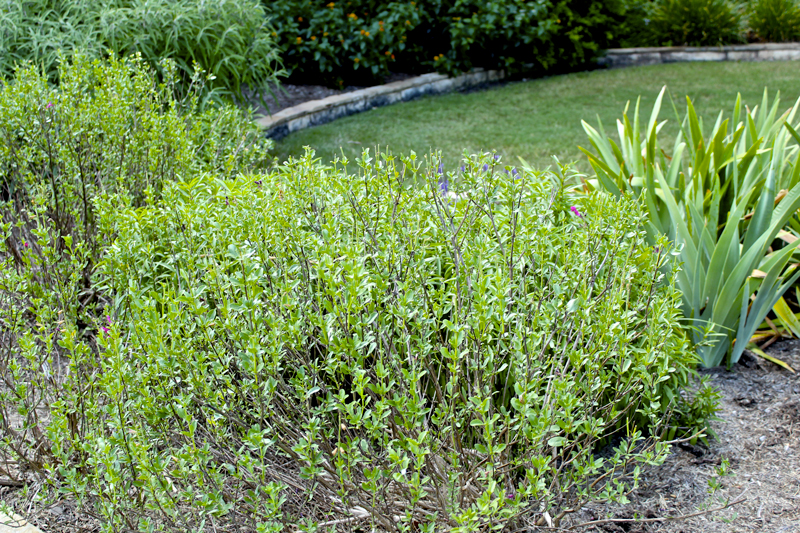
After pruning, your salvia should look like this.

Not only will shearing help ensure a second bloom cycle; it will also help to keep the plants from becoming leggy.

Short-handled pruners or long-handled loppers are the best tools for shearing. Power hedge shearers are not as easily used on woody perennials – they are best used on large hedges. Manual pruners provide a clean cut and allow for more control. Be sure to sterilize your tools with rubbing alcohol between plants to prevent any possible spread of disease, and remove all plant clippings from around the plant.

Root-hardy woody perennials that can be sheared for a second bloom cycle include plants like lantana, salvia, esperanza, Turk’s cap, rock rose, Pride of Barbados and other perennials that die back to the ground during the winter, coming back from their roots in the spring.

Local Landscape Designer and Garden Coach Diana Kirby provides landscaping tips at http:/www.dianasdesignsaustin.com and writes a garden blog at https://www.dianasdesignsaustin.com

By |2017-11-29T23:27:01-06:00July 25th, 2015|Articles|Comments Off on Prune now for second set of garden blooms

Group plants by water needs for thriving garden

DamianitaWhen writing about gardening in Central Texas, I routinely include tips for dealing with extreme heat and drought. Lately, however, I find myself focused on how to deal with rain – and lots of it. It may be an El Niño year this year, but the shortage of water has been an age-old problem and is likely to remain an ongoing issue in Texas.
While we can’t control the weather, we can plan our gardens to make the best of a variety of challenging situations. We can garden smarter.

Most of the gardeners I talk to are eager to conserve water and to lighten their landscape maintenance load as they simplify their lifestyles.

It all starts with planning.  There are so many ways to organize plants in your landscape – by color, by style, by size, by design element. However, grouping plants by water needs should top the list when you’re building a new bed or trying to update your landscape. Planting water-wise grasses in a bed with thirsty annuals will inevitably lead to unhappy plants unless you are committed to hand watering each of the thirsty plants individually.

Grouping shrubs and perennials and annuals into water use zones will help you use only the water you need for those specific areas. For example, I have many full sun, drought tolerant beds with plants that have low water needs. But I also have a shade bed with plants that need just a little more H2O, so I give them an extra hand watering once in a while – to keep my water use to a minimum and to target the plants directly.

Mixing and matching plants by water needs starts at home (as opposed to planning on the fly after an impulse stop at your favorite nursery). Good garden books, magazines, and websites provide detailed information about plants, including water, soil and light needs.  When checking national resources, be sure to look for plants that will thrive in our USDA hardiness zone, as well. Austin is generally Zone 8, with a few microclimate exceptions. The Native and Adapted Landscape Grow Green guide, published by the City of Austin and the Texas AgriLife Extension service, highlights recommended plants specifically for our area and details the water and light needs of each plant. Available at local nurseries, it’s the perfect starting point for planning landscaping projects.

Once you’ve made a wish list and headed to the nursery, check to make sure plant labels indicate whether a plant has low, medium or high water needs. If you’re not sure, ask the staff about their experience with particular varieties of plants as well.

Excellent tough-as-nails plants for our Central Texas area include native and adapted  grasses, agaves, cacti, yuccas, and woody perennials that can tolerate extreme drought conditions and miserable clay and limestone soils. A wide array of native and adapted plants—in any shape, size, color, texture or form—will thrive here with proper planting, care and water. Simply combine the right types of plants to create your favorite style—whether you prefer a Southwestern cottage look, a tropical design, or a more contemporary aesthetic.

I love the sculptural look of agaves and yuccas in the garden. I create contrast in my beds by pairing those dramatic elements with softer, gentler native or adapted flowers like salvias or grasses. Designing with complementary colors and forms and textures helps to add definition and interest.

Plant THIS with THAT

Some examples of interesting plant combinations with similar water needs include:

Low Water

  • Grey weberi agave and thryallis
  • Bright edge variegated yucca and Mexican oregano
  • Squid agave and prairie verbena
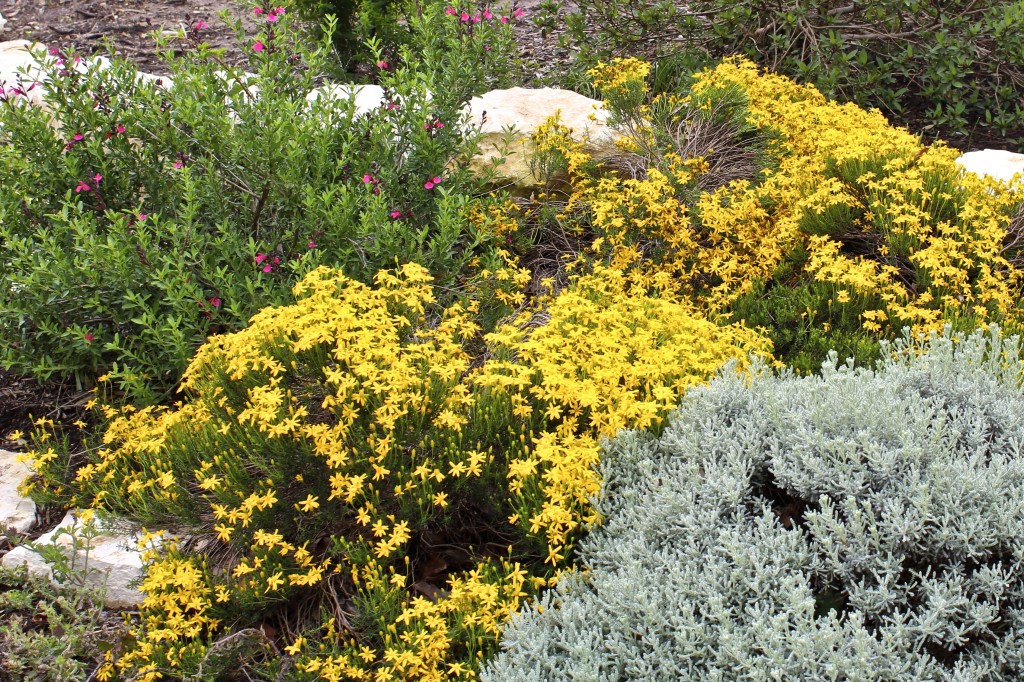
  • Raspberry salvia greggii and Mexican feather grass
  • Gulf muhly grass and silver ponyfoot

Medium Water

  • Radrazz knock-out rose and variegated Aztec grass
  • Sapphire showers duranta and coreopsis
  • Japanese aralia and river fern
  • Indigo spires salvia and bat-face cuphea
  • White tropical sage and society garlic

As you plan your next gardening project, start grouping the plants in your plan by water needs as well as design features – it will save you water, time and money.

By |2017-11-29T23:27:01-06:00June 27th, 2015|Articles|Comments Off on Group plants by water needs for thriving garden

Gardening with deer

txaas_masthead

You plan, you carefully select plants, you dig (which, in our area requires a major commitment), you mulch, you water and then you stand back to enjoy your newest landscaping project.

And, the next morning you find that the fruits of your labor must have tasted like fruit to the deer that browsed your buffet the night before, leaving nothing standing but stalks.

Even though some plants are thought to be deer resistant, each and every plant, garden, year, and deer, means a different situation fraught with risk if you live and garden where deer like to play.

My advice: Buyer beware.
Encroaching development continues to remove more natural wildlife habitat around the Central Texas area. Compound that with the horrific drought and it’s tough being a deer. During stressful times like these, deer will eat almost anything. And, trust me, your garden looks awfully tempting.

First, there is no such thing as deer proof. Even with plants that deer are known to dislike and generally avoid, the smell of freshly turned soil and mulch can entice a young deer into your garden. And while the deer may not actually eat the plant, they may paw at it until it comes up out of the ground and then simply leave it lying there, roots exposed, to dry up and die before you even notice. They even pulled the same little plant out of my bed three separate times this spring.

Deer resistant plants do exist. Many of the plant characteristics common to our native plants are distasteful to deer. They tend to turn up their noses at herbs and plants with pungent scents like garlic, rosemary and mint. Textures like fuzzy or rubbery leaves often repel them. And they generally pass by plants with thick or poisonous sap. Sometimes they leave thorny or prickly-leafed plants alone…but then again, they do eat roses.

Willing to try most anything once, deer are more likely to take a chance on new growth or young plants. Deer like vegetation that is soft and has a high water content, like succulents. And they are particularly fond of blooms, even on plants whose foliage they don’t care for. How many times have you gone out to admire a bloom on a yucca that’s been safe for years, only to find the prize flower stolen from you in the dark of night?

Their palates are particularly adventurous in the spring. Once plants are established and become woodier, deer will often pass them by. For several years, they munched on the new spring growth of my Moy Grande hibiscus, but now that the plant grows as tall as me each year, they pass it up without a second glance. If you’re willing to protect some plants briefly while they are young, or reemerging each year in the spring, they may be safe once they are mature.

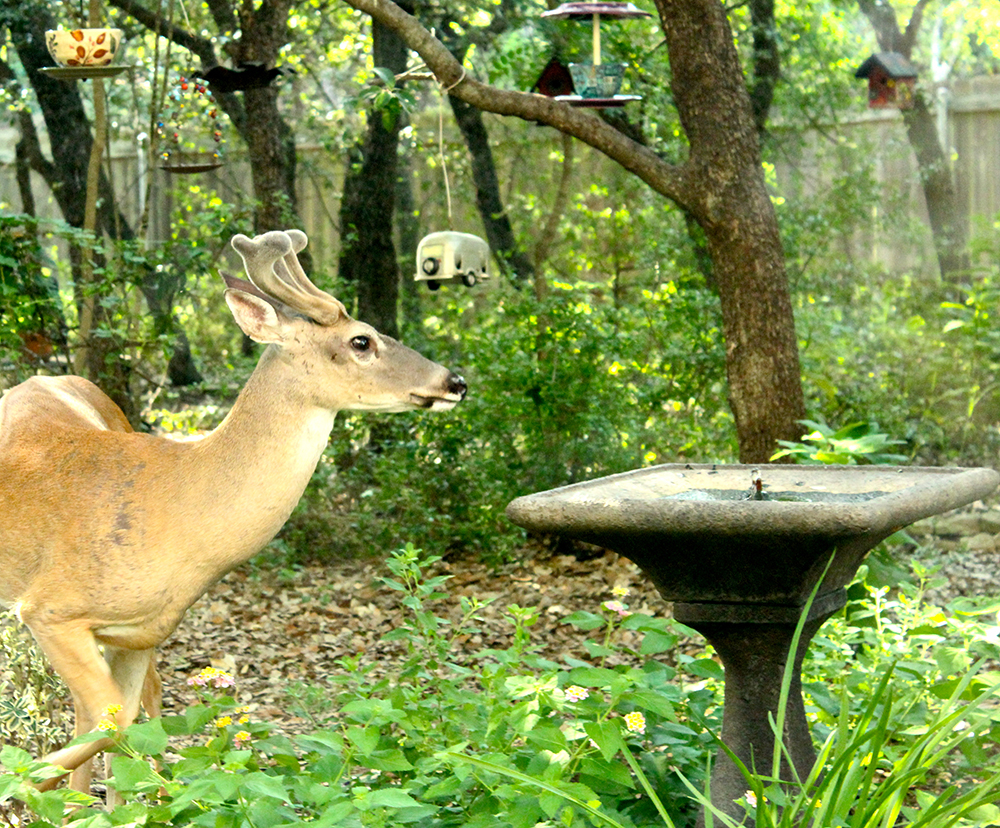
Even after all of these Central Texas torrential rains encouraging vegetative growth for deer in their wild habitat, a young doe was traipsing through my garden just last night. I saw her coming back from walking with the dogs. I’d seen signs of her in my beds for several days – her hoof prints sinking deep into the rain-drenched mulch. And there she was, looking at me, wondering if perhaps today I’d planted something new for her to try.

They check out my plants, but they also eat our bird seed, so don’t put feeders out where the deer might wander. I’ve seen them use their snout to tip up the feeder, letting the seed literally spill right into their mouths for dinner. I love watching the birds, so I deal with the occasional deer hijacking in the wooded area beside our house.

So, how can you limit your losses in the garden?

Erect physical barriers

Fences between 6-8 feet tall can help protect your plants, particularly if you have shrubs and trees near them to prevent deer from easily jumping the fence. Out in the country, electric fences or hotwires are often used to control animal access to property, but that’s not really an option for the average suburban homeowner.

For individual plants or trees, a small roll of flexible metal fencing or chicken wire, placed around the plants, can protect them from not only grazing, but also the antler-rubbing that male deer engage in during the rut. Just make sure the fencing is tall enough and that the perimeter is the appropriate long-deer-neck-stretching distance away from the vegetation you are protecting. Remember the phrase “low hanging fruit” and be sure you’re not leaving anything exposed.

For smaller plants, some types of netting are available that may help, but they can be a hazard to birds or other small animals who can become trapped in them. They can also make pruning and maintenance more difficult.

Make some noise

Deer have highly specialized ears, designed to hear potential predators from far away, and can turn their ears in any direction without moving their heads. They are easily frightened by loud sounds, so large wind chimes or other rattling things in the garden may scare them away.

Install motion or touch-based deterrent

If you don’t have a dog guarding your premises at night (ours spend their nights cozying up to my feet instead of earning their keep outside), consider a motion sensor to help keep the critters away. There are many different varieties available, from motion-detecting lights, radios, and water sprayers to touch-based sensors that shock the deer when they touch the sensor placed near tender plants.

Put up scent barriers

These include such things as urine, pepper spray, blood meal, rotten eggs, human hair, soap shavings, and even fabric softener sheets. You can buy prepared deer/critter repellant sprays at most nurseries – however – they have to be reapplied frequently, and always after rains or watering. There are also many home recipes available online that you can make yourself. But beware, they will make your garden stink. Whatever you do, don’t spill any on yourself!

Use plants that deer are most likely to avoid

I’m always amused by the wording used on deer resistant plant lists — frequently eaten, occasionally eaten, seldom eaten.

Do your research — use plants known to be distasteful to deer. Don’t buy an unfamiliar plant with the intent of ‘trying it’ to see if your deer will eat it. If you take that chance, you may be throwing money away. I’m always most attracted to new and interesting things at the nursery. Most of the independent nurseries that I shop at either have deer resistance printed on their labels (I love this, by the way), or their knowledgeable staff can tell you, so ask. Or, pull out your phone. My Google app has probably saved me a lot of heartache and money by making it easy to check online while standing in front of the plant.

I also keep many deer resistance lists on hand in a notebook in my office. Some of my favorites can be found at:

http://www.wildflower.org/collections/collection.php?collection=deer

http://www.klru.org/ctg/resource/deer-resistant-plants-nancy-webber/

http://aggie-horticulture.tamu.edu/archives/parsons/publications/deerbest.html

You can also find lists at local nurseries or on their websites:

Barton Springs Nursery

The Great Outdoors

Hill Country Water Gardens

If you do more searching, I recommend that you include the words Central Texas in your search so your results include web sites focused on local plants and deer.

My Top 10 Deer Resistant Perennial Go-To Plants

Which, simply put, means that no deer have eaten them in my garden in the 16 years I’ve been gardening with deer. For hundreds of other options, check some of the resources listed above.

  • Blackfoot daisy
  • Catmint
  • Damianita
  • Lambs Ear
  • Lantana
  • Society garlic
  • Skullcap
  • Salvia
  • Verbena
  • Zexmenia

Local Landscape Designer and Garden Coach Diana Kirby provides landscaping tips at www.dianasdesignsaustin.com and writes a garden blog at www.dianasdesignsaustin.com

By |2019-07-15T19:14:42-05:00May 23rd, 2015|Articles|Comments Off on Gardening with deer

Small space gardening

square-foot-gardening

Across the country, the move toward sustainability has people eager for new and creative ways to try their hand at vegetable gardening. Perfect for those who live in urban areas, have small properties or very little time, the concept of ‘square foot’ or ‘postage stamp’ gardening is skyrocketing in popularity. Whether prompted by a desire for the freshest or most local of foods, more and more people are harvesting dinner from their own vegetable gardens.

The roots of the ‘intensive,’ or ‘postage stamp’ gardening concept are believed to date back to France in the 1890s. Another similar approach is ‘square foot gardening,’ a concept devised by Mel Bartholomew in 1981. Both methods promote the dense planting of fruits and vegetables in small spaces with highly fertile soil.

The premise is that by keeping it simple and condensed, growing tantalizing fresh fruits and vegetables becomes much more manageable.

Regardless of which approach you use as your guide, the first step to building a small space garden is finding a suitable spot that will provide enough sun for healthy veggies. Most require at least six hours of direct sunlight. Some tender, cool weather plants, like lettuce or peas, may like a little bit of late afternoon protection from our blazing sun, but in general, find a sunny spot for your garden.

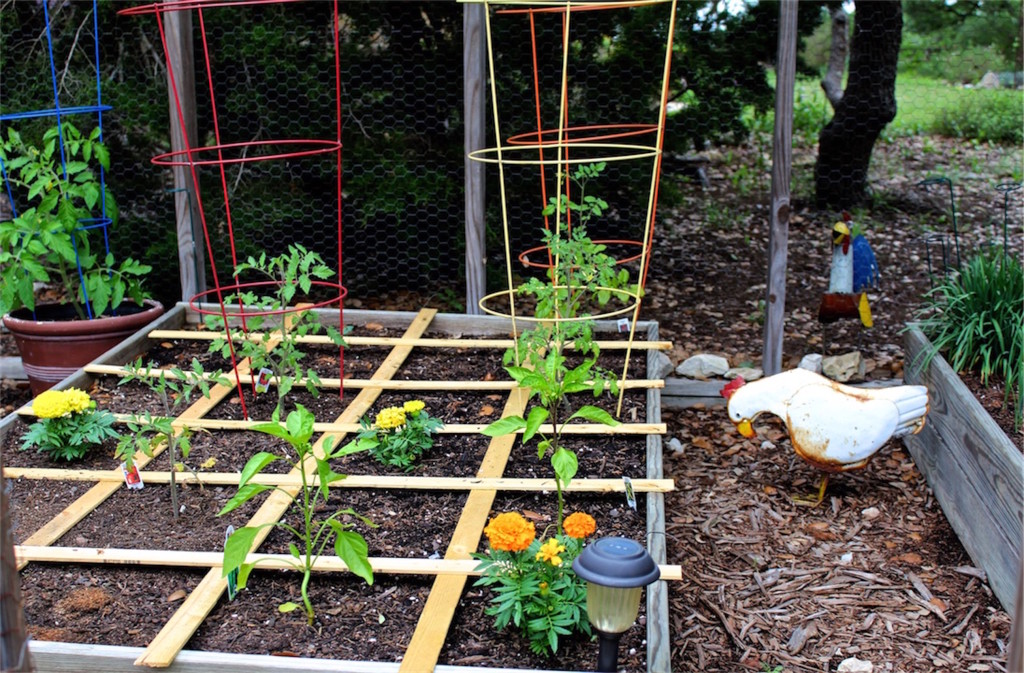
Typically made using raised beds, this style of gardening provides easy access for the gardener to harvest, prune and replant vegetables. Postage stamp gardening allows for a myriad of condensed layouts designed to fit your needs; the square foot plan involves use of 4’ x 4’ grids divided into 1’ x 1’ squares for planting.

One way to help create the best spot for your plants is to place taller vegetables on the north end of the garden and plant the others in descending order of size as you reach the other end. This will prevent taller plants from shading out the other veggies in the bed. Or, if you have some more heat sensitive plants, you can use the taller plants to provide shade for them.

Designed to produce a high-yield and diverse set of crops in a small space, begin with a nutrient-rich soil to kick-start your plants. The idea is to encourage heavy production of plants in a small space using highly fertile blended soils. This is no easy feat here in Central Texas.

While experts recommend different methods for building good soil, the fundamental components include amending our mostly clay soils with compost, sand and other organic matter. Local nurseries offer many different types of compost blends with ingredients like humus, manure, or earthworm castings. Some even sell specific square gardening soil mixes.

Vegetable gardener, Maria Tedder, says her lack of decent soil led her to try square foot gardening. “We have no topsoil at all, so I knew we would need a raised bed to grow vegetables. I read about square foot gardening and it seemed like a great way to get started.”

After her first year yielded great results, Tedder has now expanded her vegetable garden to two 4’ x 4’ garden beds.

“Our experience with this approach has been fabulous. We’ve enjoyed so many fresh vegetables from our garden,” said Tedder.


By placing plants very close together, these small space approaches will help to eliminate weeds and reduce watering needs. Weeds will be crowded out by healthy veggies and the smaller garden means you have less physical area to water. Less weeds and less water? Sounds like a great plan.

Dense planting works well for smaller plants, but be careful not to exceed your space limitations. For example, an indeterminate tomato plant (which can easily grow to be at least 6 feet tall by 3 feet wide and requires heavy-duty staking), will be an unwelcome guest in a garden where each plant’s property lines are 1’ x 1’. Overcrowding the space can also lead to poor circulation and can be a breeding ground for some diseases.

Train your vining vegetables up on poles, supports or trellises as much as possible, using the vertical space in your garden as well as the ground.

Consider adding companion plants to your garden as well. There are many plants that can provide a habitat for beneficial insects that will provide pest control and encourage pollination of your crops.

And, you can use the outer edges of your garden to plant decorative vegetables and plants in your small space garden. Pretty edible nasturtium flowers, bright and colorful Swiss chard and lovely strawberries can create a beautiful frame for your harvest.

If you’re ready to begin your foray into vegetable gardening, you can check out “The Postage Stamp Vegetable Garden” by Karen Newcomb, or “All New Square Foot Gardening” by Mel Bartholomew.

Local Landscape Designer and Garden Coach Diana Kirby provides landscaping tips at www.dianasdesignsaustin.com and writes a garden blog at www.dianasdesignsaustin.com

By |2020-05-19T16:50:21-05:00April 25th, 2015|Articles|Comments Off on Small space gardening
Go to Top