Fall

Summer still hanging on in the garden …

It’s hard to believe that it was 93 degrees here in Austin yesterday. While I am ready for the crisp edges of autumn, I have to admit that the lasting beauty of the summer garden is a daily delight.

The Lord Baltimore hibsicus, Pride of Barbados and variegated shell ginger are all perfectly happy with the hot weather.

The Tecoma stans, or Esperanza, are still blooming like crazy.

The path down the side of the house still has some blooms, though they are beginning to dwindle.  Except for the Salvia madrensis, or pineapple sage, which blooms very late in the summer (well, OUR summer, that is).

These stunning spires are criss crossing with a single Salvia greggii bloom.

And at the end of the path, Artemis awaits.

Her hairdo, comprised of squid agave and creeping Jenny, adds a whimsical touch.

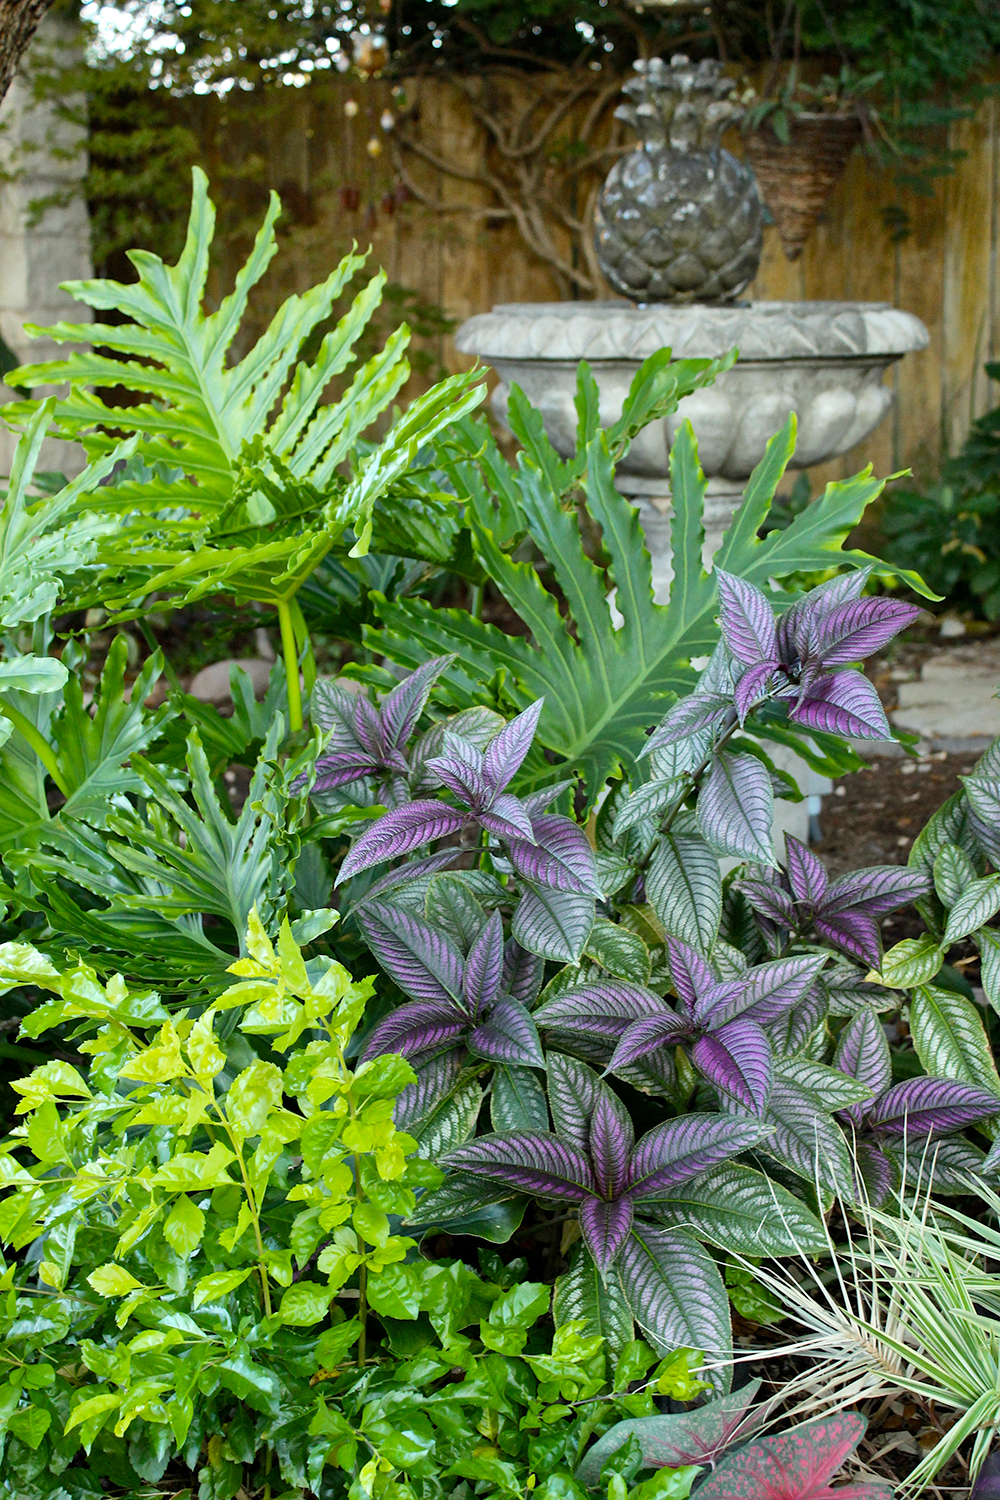
In the back, the fountain shade garden is lush with tropical flair, including Persian shield, Philodrendron, Coleus, sparkler sedge and Duranta ‘golden showers.’

The front bed is full or oranges and yellows at this time of year, with narrow leaf Zinnia, Calylophus, and Asclepia.

More yellow awaits farther up the bed with this Thryallis, the whale’s tongue agave and a view of the deep orange Tecoma ‘balls of fire.’

Yes, the brisk breezes of fall sound very appealing, but I love enjoying these long-lasting Indian summer blooms.  The forecast calls for a drop this week — 90 on Wednesday and then 80 for the high on Thursday, and 74 on Friday.

It’s coming, it’s just a little slow getting here!

By |2017-11-29T23:26:55-06:00October 16th, 2016|Sharing Nature's Garden|1 Comment

Propagate now to grow new spring plants

Propagate-Plants-for-Spring

Fall will eventually usher in cooler temperatures, and with them, a brand new gardening to-do list. Shrubs, trees, bulbs and wildflower seeds will eagerly await planting time. While weeding and planting may dominate today’s short-term list, it’s not too early to plan ahead for winter.

With the tiniest temperature break, many plants in my garden are looking perky again. But I know that the first frost or freeze will take some of them out – killing the annuals and pushing the root hardy perennials into dormancy.

Most of us in the Central Texas area garden in USDA Zone 8, meaning many plants that don’t tolerate cold weather will have to be replanted come spring.

Rather than buying new plants next March, I will be propagating some and overwintering them in the greenhouse or the house. An inexpensive way to create new plants from those you’re already enjoying, taking cuttings produces plants genetically identical to the parent plant.

Many kinds of plants – woody and herbaceous – can be grown from cuttings. Different plants require different types of cutting methods, so make sure to research your particular plant’s needs before taking a cutting. One of the methods commonly used by homeowners is stem cutting, which is what I’ll be doing in my garden.

I plan to take cuttings of my Persian Shield, Strobilanthus dyerianus, so I have several new plants to use next spring. It’s often described as an herbaceous perennial, but it’s only hardy in USDA zones 10 and 11 (we are classified as zone 8). It can also be grown as a houseplant.

In my garden, it’s annual, dying with the first frost. Because it provides such a dramatic iridescent purple pop of color to my garden, I always buy new ones each spring. It’s a full shade plant and it does need an occasional extra squirt of water with the hose in the hottest parts of summer. I have it close to my pots and hand water it with them periodically.

Preparing to take cuttings

Before you start, clean your pruning tool by dipping it in rubbing alcohol or a mixture of one part bleach to nine parts water to prevent the spread of bacteria or fungi. Make sure you have a sharp blade to minimize any damage to the plant. To help promote root growth, you should also have some rooting hormone on hand. Rooting hormone can be purchased at most nurseries.

In your container, place a mixture of peat, vermiculite and perlite or sand and peat and water it. The potting mix should be sterile, like seed starting mix, so don’t use garden soil.

Make a straight cut 3-6 inches long, from the tip of a plant stem, at a 45-degree angle. You want to create the largest rooting area possible. Include the end of the stem and some leaves. Remove the lower leaves so the plant’s energy is used for root growth, rather than foliage growth. Remove the lower 1-1/2 inches of leaves on the stem, wet the stem, and dip the bottom inch or more into the rooting hormone powder, making sure some wounds from the leaf removal are buried. Then make a hole with a pencil in the growing mix and place the bottom of the stem into the soil and press down on the soil around the stem to hold it in place. Don’t press the cutting itself straight into the growing medium without making a hole, as this will rub the growth hormone off of the stem.

Taking care of cuttings

I’ll put my cuttings in my greenhouse in another month or so, but you can also make a small, pot-sized greenhouse for your cutting by placing an empty plastic jar, cut soda bottle or plastic bag over the plant. If you use a plastic bag, place straws or skewers around the plant to prevent the bag from touching the plant. The bag will keep the humidity high to reduce the amount of moisture loss. Keep the growing medium consistently moist.

Place the cutting pot in bright, but indirect light in a warm spot like a windowsill that doesn’t get direct sun. You can also use a heat mat, available at nurseries or garden centers and online, to encourage rooting.
Next spring, after the danger of a frost has passed, the cuttings will be healthy plants, ready to go out into the landscape.

Local Landscape Designer and Garden Coach, Diana Kirby, provides landscaping tips on Facebook at Diana’s Designs, at www.dianasdesignsaustin.com and writes a garden blog at www.dianasdesignsaustin.com .

By |2017-11-29T23:26:58-06:00October 24th, 2015|Articles|Comments Off on Propagate now to grow new spring plants

Freshen containers to rejuvenate your hot garden

tall-container-fall-flowers

About this time of year, even the toughest Central Texas gardens and gardeners start to melt a little. With May rains but a distant memory, the unrelenting heat is taking its toll.

A quick and simple way to re-energize yourself and your garden for the slow journey into fall, consider refreshing your container plantings. If you have a nice pot with crispy inhabitants, now is the perfect time to start over. A fresh set of plants can provide a beautiful backdrop until the first frost.

Since the cooler temperatures of true fall won’t show themselves for a while, containers planted now still need to include plants that tolerate warm temperatures. Focusing on plants with new seasonal colors enables us to imagine that our respite awaits around the corner.

Designing a great container takes a little knowledge, some basic planning and a dash of creativity.

And pots aren’t just for patios anymore. Out in the landscape, containers create focal points, bring height or add shallow interest to existing landscape beds. In addition to creating conversation pieces with your plants, you can make use of things lying around in your attic or garage to create whimsical containers. A coat of paint in the right pop of color on a stock tank, or a simple plastic liner with a few holes placed into an old wooden box can transform your stuff into a welcome addition in your house or your garden.

Successful planting

As you pick your palette of plants, consider enhancing your creation with a varied selection of shapes, colors and textures. These contrasts will help your plants stand out. Your design can be symmetrical – balanced evenly all the way around, or asymmetrical, with unique plants extending to different distances on the sides or down the container. To achieve repetition and make your planter cohesive, you don’t have to duplicate the same plants around the container – just use plants with a similar color or texture.

Make sure you choose plants with the same sun and water needs so you aren’t over or under-watering any of your plants. Plants that appreciate the relief of a shady spot don’t fare well when combined with sun lovers. Most succulents and grasses make good partners since neither of them requires a lot of water and they both appreciate the sun. Adding a little mulch to your containers helps keep the soil cooler and lessens evaporation.

To keep your container plants thriving, it’s important to start with a good container soil that will allow drainage. Don’t use a pot without a hole in the bottom – this is the most common mistake in container gardening and can spell doom for your plants.

One tip for use in over-sized containers is to fill up the bottom with some alternate material if the plants you install in the planter don’t need all the root space of the container. You can fill the pot’s bottom with a variety of materials so not as much potting soil is needed. Make sure to use materials that won’t break down or decompose.

While there isn’t a formula to determine how many plants you should place in a container, it’s important to remember that your plants will grow. Consider carefully how they will mature – will they get taller, wider or trail and will they have enough room a month or two from now? You can plant things that may outgrow your pot after the season is over; then you can move them into your landscape and add new plants to the pot for the next season.

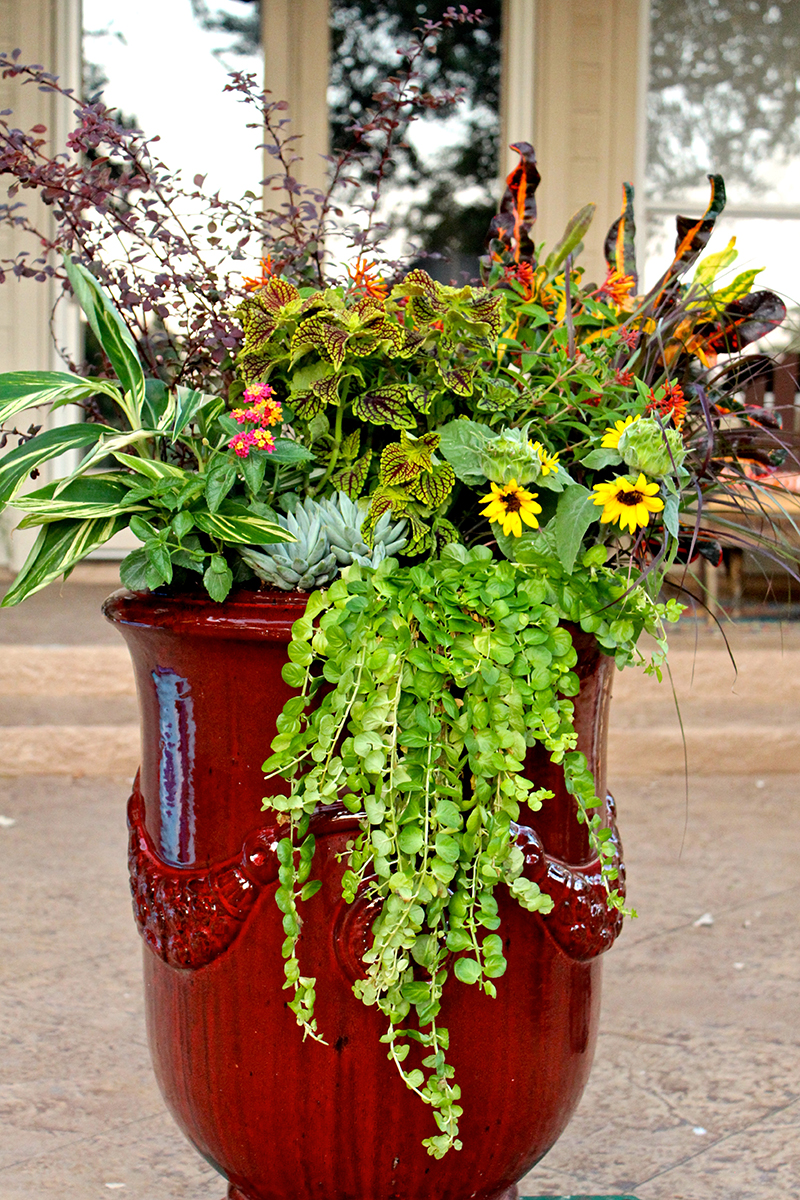
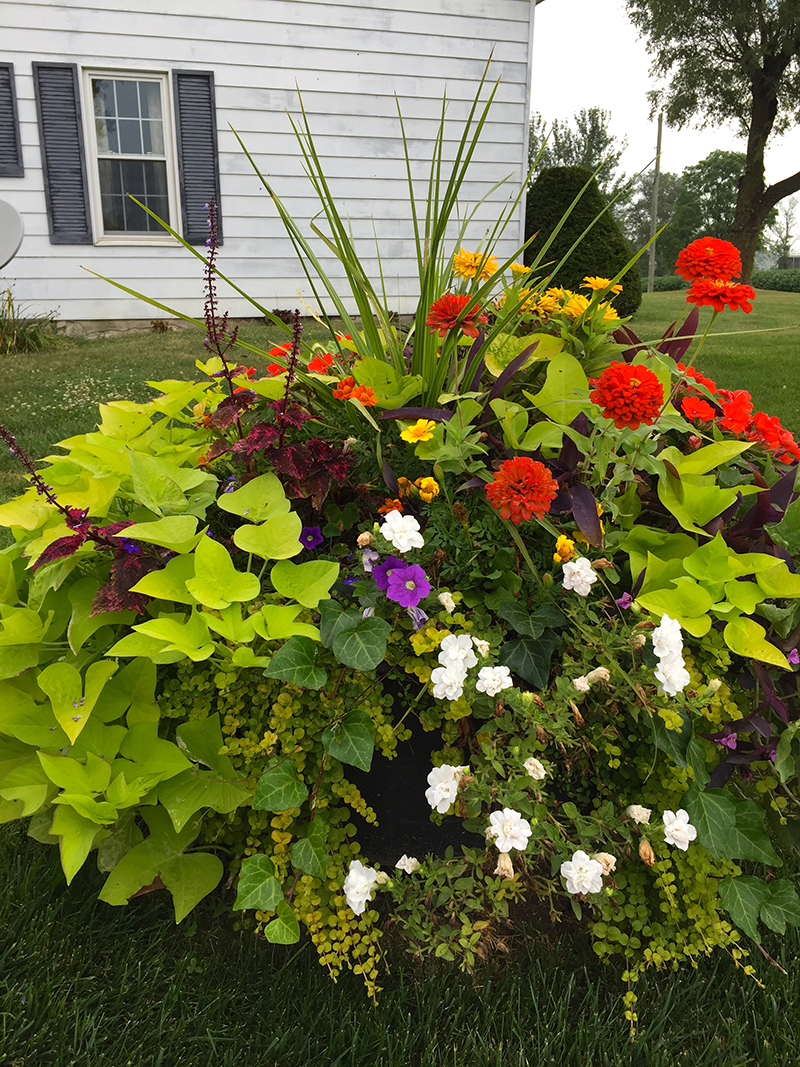
For containers that will hold more than one pretty plant, remember to include thrillers, spillers, and fillers. What are thrillers, spillers and fillers? That’s the recipe for making beautiful pots of plants – place a tall focal point (thriller) in the middle or the back of the container to rise up above the other plants and make an impact. Then place smaller plants (fillers) with contrasting or coordinating colors around the tall plant. Then finish the project with trailing plants around the inside perimeter of the pot to cascade down over the sides (spillers).

A good organic fertilizer ensures that your plants remain healthy, even as some of the nutrients leach from the soil through watering. Products like seaweed, fish emulsion or Hasta Grow are good organic choices.

Local nurseries, books, garden magazines and online resources like Pinterest and Houzz are brimming with beautiful container ideas and DIY information you can use to transform your garden containers.

Local Landscape Designer and Garden Coach Diana Kirby provides landscaping tips on Facebook at Diana’s Designs, at www.dianasdesignsaustin.com and she writes a garden blog at www.dianasdesignsaustin.com .

By |2017-11-29T23:27:01-06:00August 22nd, 2015|Articles|Comments Off on Freshen containers to rejuvenate your hot garden

July tip: thrillers, spillers and fillers

thrillers, spillers and fillers

For containers that will hold more than one pretty plant, remember to include thrillers, spillers, and fillers. What are thrillers, spillers and fillers? That’s the recipe for making beautiful pots of plants – place a tall focal point (thriller) in the middle or the back of the container to rise up above the other plants and make an impact. Then place smaller plants (fillers) with contrasting or coordinating colors around the tall plant. Then finish the project with trailing plants around the inside perimeter of the pot to cascade down over the sides (spillers).

Read the full article.

By |2017-11-29T23:27:01-06:00July 22nd, 2015|Tips|Comments Off on July tip: thrillers, spillers and fillers
Go to Top